AzurePowershellを利用して特定のタグが付与されたリソース名を取得してみました。
構成管理やリソース一覧を定期的に取得する際に利用できるかと思います。
1.事前準備
1-1.AzurePowershellのインストール
PAzurePowershellを実行しますのでAzurePowershellモジュールが必要になります。
以下の記事にインストール方法を記載していますので必要であれば参考にしてください。

1-2.サービスプリンシパルの作成
Azureのリソースを操作するために今回はサービスプリンシパルを利用します。
以下の記事にサービスプリンシパルの作成方法を記載していますので必要であれば参考にしてください。
1-3.Powershellスクリプトファイルの作成
以下の内容でpowershellファイル(拡張子が ps1 となるファイル)を作成します。
# 出力先のファイルパスを定義する
$Path = "C:\hogehoge\tag_result.json"
# 各情報が記載されたファイルから中身を読み取る
$ApplicationId = Get-Content C:\hogehoge\ApplicationId.txt
$Secret = Get-Content C:\hogehoge\Secret.txt
$tenantId = Get-Content C:\hogehoge\tenantId.txt
# クレデンシャルを作成する
$pw = ConvertTo-SecureString -String $Secret -AsPlainText -Force
$pscredential = New-Object -TypeName System.Management.Automation.PSCredential -ArgumentList $ApplicationId, $pw
# ログインする
Connect-AzAccount -ServicePrincipal -Credential $pscredential -Tenant $tenantId
# 特定のファイルに指定したタグのリソース名を取得してファイルに書き込む
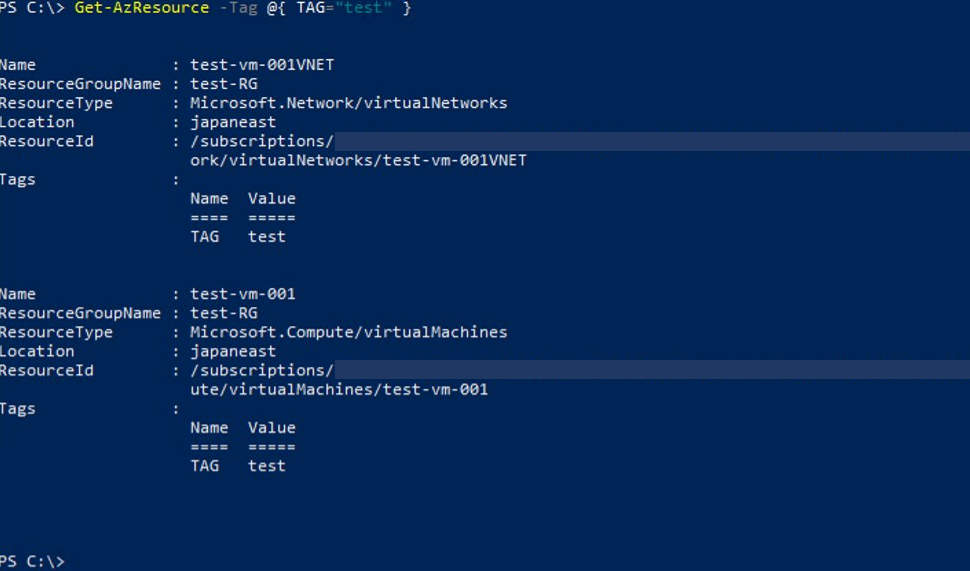
(Get-AzResource -Tag @{ TAG="test" }).name | ConvertTo-Json | Out-File $Path -Encoding utf8 -Appendこのスクリプトを実行することで、
指定したファイルにタグ名が[TAG]の中でタグの値が[test]であるリソース名を追記する
という処理を実行することができます。
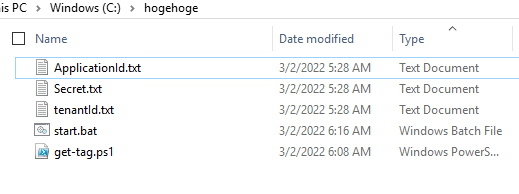
1-4.スクリプト内で利用するファイルを配置
「ApplicationId.txt」「Secret.txt」「tenantId.txt」を用意します。
また今回は「get-tag.ps1」を「start.bat」というファイルを用意してバッチファイルで実行しています。
以下の記事にPowershellファイルをバッチで起動する方法を記載していますので必要であれば参考にしてください。

2.Powershellスクリプトを実行する
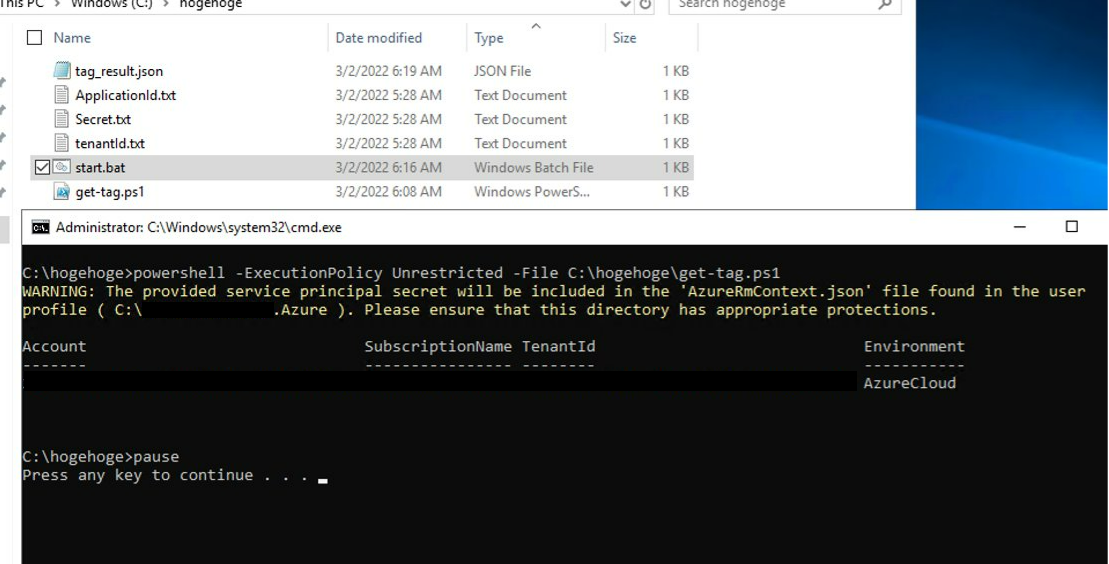
準備が完了したらバッチファイルを実行します。
バッチファイルが実行されるとコマンドプロンプトが起動し、ps1ファイルのスクリプトも実行されていきます。
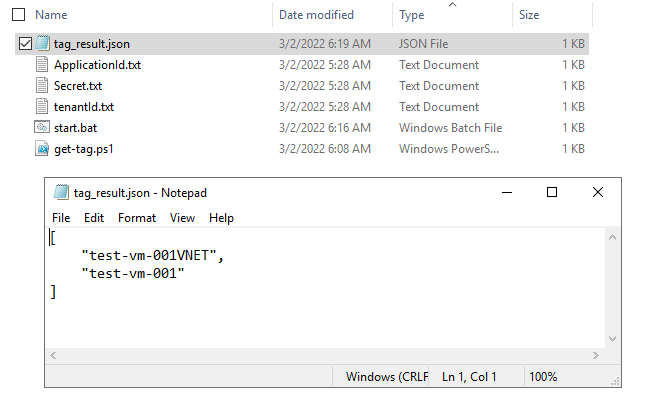
実行が終わると、以下のように「tag_result.json」というファイルが作成され、「タグ名が[TAG]の中でタグの値が[test]であるリソース名」が記載されます。
今回はタグの値が TAG:test となっているリソースが2つあることが確認できました。
[参考] 手動で実行も可能
バッチファイルを実行するのでなく、Powershellのインターフェース上から上記のスクリプトを手動実行することも可能です。
ただし、その場合にはpowrshellの実行ポリシーには注意してください。
[参考] Tagで取得できる情報について
Azureのリソースにおいて、タグが設定されている場合に取得できる情報には
「Name」「ResourceGroup」「ResourceType」「Location」「ResourceId」
があります。
この中から今回は「Name」を取り出して出力しています。